 And then I discussed my Flickr frustration with my husband, and he pointed out the problem to me (it should be mentioned that he's a tech guy): the new Flickr is made for tablets & iPads. no one is making things for computers anymore.
WHAAAAAAAAAAAA.
Yes, I understand that everyone has tablets. Yes, smart phones are the norm. Touch screens? EVERYWHERE. But the back-end "work" side of these things are done on actual computers, I think? I don't know about you, but I'm one of those assholes that get emails on my phone and don't reply because I DON'T WANT TO TYPE ON THAT GODDAMN TINY KEYBOARD LET ME WAIT UNTIL I GET HOME. I also think that I may be one of the few people who still loved the comment aspect of Flickr and the community of that? And I *know* people through that. And I think the comments are the afterthought - they are pushing "favoriting". Fine. It was easy and lovely to see and be a part of this commenting community and I think it will be lost.
I also had a really shocking thing happen with this new FLickr - the giant pics, the ones that are yelling at me? When things were in thumbnails there was no problem of running into a GIANT IMAGE OF A BLEEDING FOOT that happened to be in my photostream. It was just a thumbnail! AND NOW IT'S MY WHOLE SCREEN!!!!
I think Flickr was just re-vamped for a new tech-"generation" but it should be configured more for the current "generation" that is on there. Flickr has LOYAL customers, they should cater to them a bit.
I can't get into my confusion about the changes in Pro terms right now. I'm so so so baffled.
And then I discussed my Flickr frustration with my husband, and he pointed out the problem to me (it should be mentioned that he's a tech guy): the new Flickr is made for tablets & iPads. no one is making things for computers anymore.
WHAAAAAAAAAAAA.
Yes, I understand that everyone has tablets. Yes, smart phones are the norm. Touch screens? EVERYWHERE. But the back-end "work" side of these things are done on actual computers, I think? I don't know about you, but I'm one of those assholes that get emails on my phone and don't reply because I DON'T WANT TO TYPE ON THAT GODDAMN TINY KEYBOARD LET ME WAIT UNTIL I GET HOME. I also think that I may be one of the few people who still loved the comment aspect of Flickr and the community of that? And I *know* people through that. And I think the comments are the afterthought - they are pushing "favoriting". Fine. It was easy and lovely to see and be a part of this commenting community and I think it will be lost.
I also had a really shocking thing happen with this new FLickr - the giant pics, the ones that are yelling at me? When things were in thumbnails there was no problem of running into a GIANT IMAGE OF A BLEEDING FOOT that happened to be in my photostream. It was just a thumbnail! AND NOW IT'S MY WHOLE SCREEN!!!!
I think Flickr was just re-vamped for a new tech-"generation" but it should be configured more for the current "generation" that is on there. Flickr has LOYAL customers, they should cater to them a bit.
I can't get into my confusion about the changes in Pro terms right now. I'm so so so baffled.
Tuesday, May 28, 2013
Maybe I'm Old? And That's Fine.
Flickr just changed it's user interface this past week, and it was pretty dramatic. I'm not a fan of change, and I know I'm not, so I gave myself a bit of time to get used to this. And I just can't. I tried - infinitely scrolling (and waiting for things to load in that scrolling....), not having comments as readily available, everything being an icon.
 And then I discussed my Flickr frustration with my husband, and he pointed out the problem to me (it should be mentioned that he's a tech guy): the new Flickr is made for tablets & iPads. no one is making things for computers anymore.
WHAAAAAAAAAAAA.
Yes, I understand that everyone has tablets. Yes, smart phones are the norm. Touch screens? EVERYWHERE. But the back-end "work" side of these things are done on actual computers, I think? I don't know about you, but I'm one of those assholes that get emails on my phone and don't reply because I DON'T WANT TO TYPE ON THAT GODDAMN TINY KEYBOARD LET ME WAIT UNTIL I GET HOME. I also think that I may be one of the few people who still loved the comment aspect of Flickr and the community of that? And I *know* people through that. And I think the comments are the afterthought - they are pushing "favoriting". Fine. It was easy and lovely to see and be a part of this commenting community and I think it will be lost.
I also had a really shocking thing happen with this new FLickr - the giant pics, the ones that are yelling at me? When things were in thumbnails there was no problem of running into a GIANT IMAGE OF A BLEEDING FOOT that happened to be in my photostream. It was just a thumbnail! AND NOW IT'S MY WHOLE SCREEN!!!!
I think Flickr was just re-vamped for a new tech-"generation" but it should be configured more for the current "generation" that is on there. Flickr has LOYAL customers, they should cater to them a bit.
I can't get into my confusion about the changes in Pro terms right now. I'm so so so baffled.
And then I discussed my Flickr frustration with my husband, and he pointed out the problem to me (it should be mentioned that he's a tech guy): the new Flickr is made for tablets & iPads. no one is making things for computers anymore.
WHAAAAAAAAAAAA.
Yes, I understand that everyone has tablets. Yes, smart phones are the norm. Touch screens? EVERYWHERE. But the back-end "work" side of these things are done on actual computers, I think? I don't know about you, but I'm one of those assholes that get emails on my phone and don't reply because I DON'T WANT TO TYPE ON THAT GODDAMN TINY KEYBOARD LET ME WAIT UNTIL I GET HOME. I also think that I may be one of the few people who still loved the comment aspect of Flickr and the community of that? And I *know* people through that. And I think the comments are the afterthought - they are pushing "favoriting". Fine. It was easy and lovely to see and be a part of this commenting community and I think it will be lost.
I also had a really shocking thing happen with this new FLickr - the giant pics, the ones that are yelling at me? When things were in thumbnails there was no problem of running into a GIANT IMAGE OF A BLEEDING FOOT that happened to be in my photostream. It was just a thumbnail! AND NOW IT'S MY WHOLE SCREEN!!!!
I think Flickr was just re-vamped for a new tech-"generation" but it should be configured more for the current "generation" that is on there. Flickr has LOYAL customers, they should cater to them a bit.
I can't get into my confusion about the changes in Pro terms right now. I'm so so so baffled.
Monday, March 11, 2013
TCB
I've been making some progress on the previously mentioned UFO pile. I'm focusing on the sweaters, as I've got a few plans for FUTURE sweaters, and I'm not to start them until I get through the unfinished batch. So: PROGRESS!
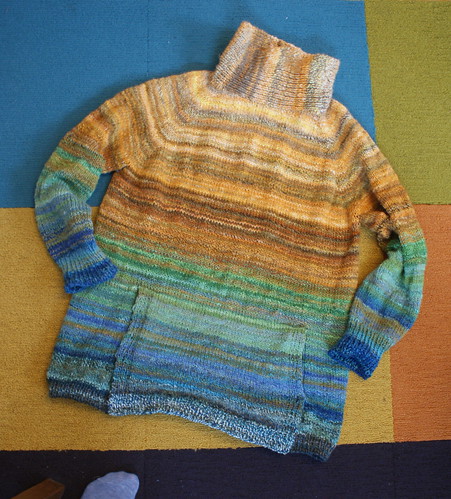 First up, this HY-SCF-SE combo handspun version of the Tourist Sweater. This was a super simple knit, and my main delay was that I was working the sleeves at the same time as the body in order to keep the progression true throughout. A couple of snow days, some wintry weather, and HUZZAH! Like that, a sweater is born. It's super comfy and warm and delightful.
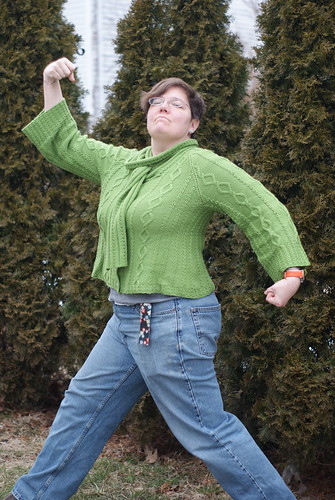 Next up: Sweet, Sweet Coventry. This is knit up in Quince&Co "Chickadee" and it's got a delightful drape. This being cables, I had to pay a bit more attention, and it featured a lot of scattered decreases. The scarf portion was nearly the death of me - I HATE knitting scarves, and rarely, if ever, finish them. The bell sleeves on this are wonderful, it's a great color, a great weight, and I think I'll be wearing it a ton. I'll likely run a ribbon band behind the buttons and along the button band so it will hold it's shape a bit better.
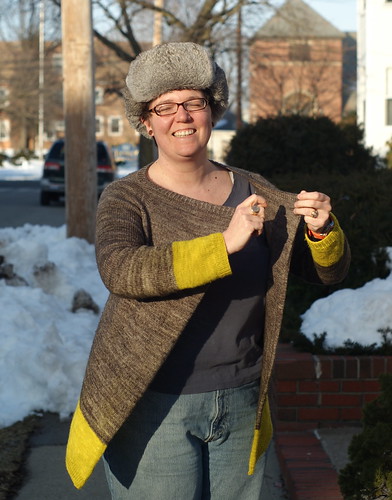 And then there's this Caramel Sweater. It's tosh merino light and JDMS and it's fantastically light and airy. It was a pretty boring knit, but I like to have a simple knit for in the car and watching intense movies. The only problem with this one is that the yellow bled PROFUSELY during the soak and block (and re-soak. And re-soak. AND.......etc.) It's not so bad that I won't wear it, but it's sad and disappointing nonetheless.
 There are 2 more sweaters that are in need of completion, but they're on hold for another week while I take care of some contract knitting. Which is a nice break at this point :)
First up, this HY-SCF-SE combo handspun version of the Tourist Sweater. This was a super simple knit, and my main delay was that I was working the sleeves at the same time as the body in order to keep the progression true throughout. A couple of snow days, some wintry weather, and HUZZAH! Like that, a sweater is born. It's super comfy and warm and delightful.
Next up: Sweet, Sweet Coventry. This is knit up in Quince&Co "Chickadee" and it's got a delightful drape. This being cables, I had to pay a bit more attention, and it featured a lot of scattered decreases. The scarf portion was nearly the death of me - I HATE knitting scarves, and rarely, if ever, finish them. The bell sleeves on this are wonderful, it's a great color, a great weight, and I think I'll be wearing it a ton. I'll likely run a ribbon band behind the buttons and along the button band so it will hold it's shape a bit better.
And then there's this Caramel Sweater. It's tosh merino light and JDMS and it's fantastically light and airy. It was a pretty boring knit, but I like to have a simple knit for in the car and watching intense movies. The only problem with this one is that the yellow bled PROFUSELY during the soak and block (and re-soak. And re-soak. AND.......etc.) It's not so bad that I won't wear it, but it's sad and disappointing nonetheless.
There are 2 more sweaters that are in need of completion, but they're on hold for another week while I take care of some contract knitting. Which is a nice break at this point :)
Thursday, March 7, 2013
Finishing
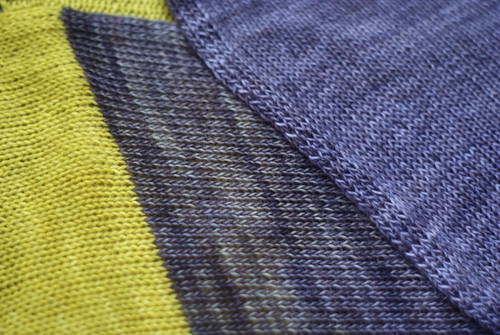
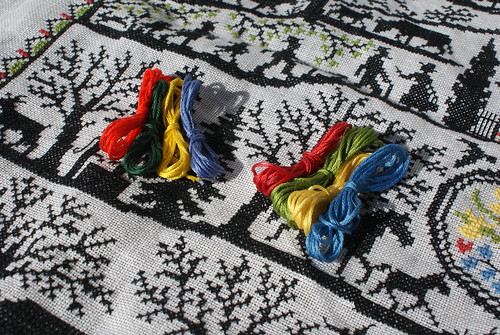
 I completed the stitching on my giant cross-stitch project (Silhouette Collage by Eva Rosenstand) just about a month ago. Since then, I've been gathering together the bits needed to frame and mat the piece. This has largely consisted of a 1. keeping the finished cross-stitch piece safe from harm, 2. getting a heavy mat board that is large enough, and 3. finding a decent frame. The finished piece is....in the realm of 16" x 19" if I recall, so I opted for a standard 20" x 24" frame which would allow a fairly even amount of space all around the stitching without being too large or small.
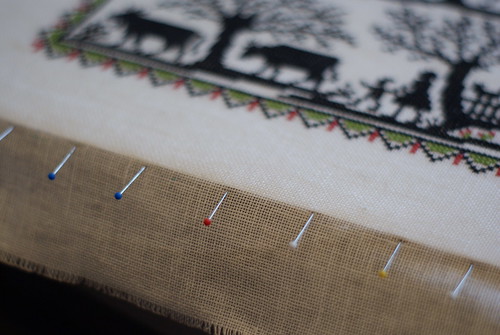
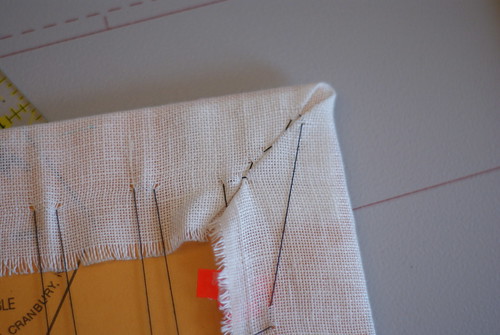
 Once I gathered all of these things, I carefully pressed the completed piece. Working on the back of the piece, I measured out from each edge to center it within the frame, and I marked each of the corners and sides with an air-erase marker. This let me place the cut mat on the back, lining up to the marks, and not have to worry about working both sides of the piece at the same time, checking and flipping in order to center.
I then worked around and across the piece tacking the edge down with pins, right along the very edge of the mat, using straight pins. The whole process is very similar to stretching a canvas. I would work opposite sides, from the center out, then switch to the other 2 sides. I continued working around and across, adjusting and re-adjusting as I went along. This is the portion of the process that really takes the most time, and it's important that you get it right! Expect to use ~1200 pins.
Once I gathered all of these things, I carefully pressed the completed piece. Working on the back of the piece, I measured out from each edge to center it within the frame, and I marked each of the corners and sides with an air-erase marker. This let me place the cut mat on the back, lining up to the marks, and not have to worry about working both sides of the piece at the same time, checking and flipping in order to center.
I then worked around and across the piece tacking the edge down with pins, right along the very edge of the mat, using straight pins. The whole process is very similar to stretching a canvas. I would work opposite sides, from the center out, then switch to the other 2 sides. I continued working around and across, adjusting and re-adjusting as I went along. This is the portion of the process that really takes the most time, and it's important that you get it right! Expect to use ~1200 pins.
 Once all the sides were pinned, I checked my work, making sure that I had not strained the grain of the cloth too much at any point, double-checking that it was straight and centered, all that little nuisancey stuff. Once I was happy with how things were situated, I flipped over to work on the back.
With needle and sturdy thread, I did large whip-stitches across the back, catching the excess fabric from opposite edges. This is also worked from the center out, in either direction. I added thread as needed, and tightened as I went along (it is similar to lacing a corset, if that helps), and I stopped just shy of the corners.
Once all the sides were pinned, I checked my work, making sure that I had not strained the grain of the cloth too much at any point, double-checking that it was straight and centered, all that little nuisancey stuff. Once I was happy with how things were situated, I flipped over to work on the back.
With needle and sturdy thread, I did large whip-stitches across the back, catching the excess fabric from opposite edges. This is also worked from the center out, in either direction. I added thread as needed, and tightened as I went along (it is similar to lacing a corset, if that helps), and I stopped just shy of the corners.
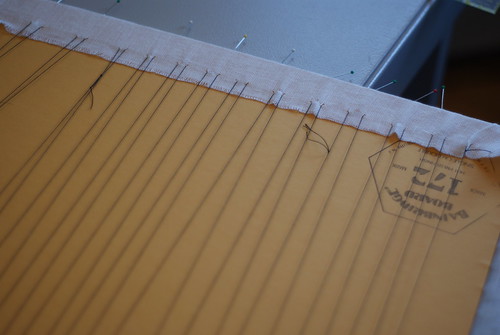 I made sure to do the lacing about an inch in from the edge of the cloth so it wouldn't rip out. This is all done quite messily and hastily.
 I laced a bit in the opposite direction (sorry, no pictures) and hooked under some of the initial threading to tighten things up a bit. Then I moved on to the corners. Many people will fold the corners down flat, but I prefer to work a mitered corner. I folded the excess cloth in and down, and (again, hastily) whipped together the mitered edges.
 I tied everything off however and wherever I could. Then I removed the pins.....and flipped it over to see how it worked! And it worked out just fine. All that was left was to plop it into a frame and hang it on the wall, and that took just 5 more minutes.
 Hooray! Completed, safe, and out for all to enjoy. I'm thrilled with how it turned out.
Tuesday, February 5, 2013
It's That Time Again!
I've teamed up with Adrian, Maryse, and Cheryl once again to host Potholder Swap!
We took a year off, but we're back!
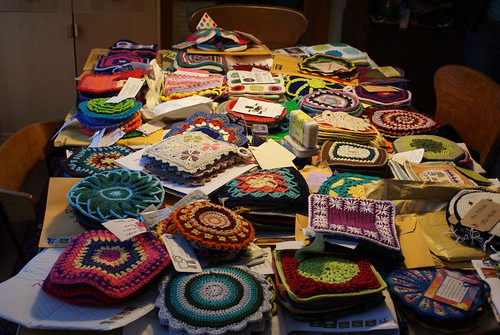 We've updated the Ravelry group with all the details, and we can't see what awesome things you make this year!
We've updated the Ravelry group with all the details, and we can't see what awesome things you make this year!
Thursday, January 10, 2013
New Year: New Projects, Old Projects, The Things We Do
Wow, and here we are in 2013!
A few things right away:
THIS.
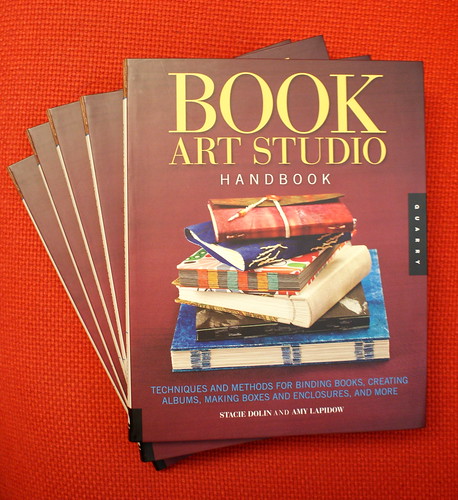 My book is out! After many many editings and many many photoshoots, along with being told that the book was set for APRIL 2013 publication, the book that I wrote with Amy Lapidow came out a week before Christmas! I'm thrilled to hold it in my hands, though I will admit to not yet sitting down and really spending any time with it yet. (I was still exhausted from looking through the same pages so many times....) But I am THRILLED THRILLED THRILLED that it is out and very excited to see what people make from it!
In 2013 news, I've decided to take on a few larger projects - one new, many old.
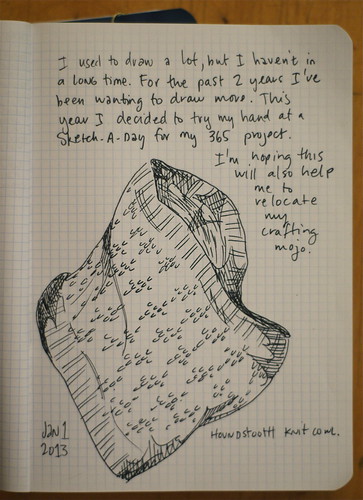
First up, I've decided to do a sketch-a-day through the year. I'm already mildly anxious for warmer weather as all of my sketches so far are late night, in the house.
My book is out! After many many editings and many many photoshoots, along with being told that the book was set for APRIL 2013 publication, the book that I wrote with Amy Lapidow came out a week before Christmas! I'm thrilled to hold it in my hands, though I will admit to not yet sitting down and really spending any time with it yet. (I was still exhausted from looking through the same pages so many times....) But I am THRILLED THRILLED THRILLED that it is out and very excited to see what people make from it!
In 2013 news, I've decided to take on a few larger projects - one new, many old.
First up, I've decided to do a sketch-a-day through the year. I'm already mildly anxious for warmer weather as all of my sketches so far are late night, in the house.
 But the thing I'm really looking forward to - I mean REALLY - is taking care of some unfinished projects. I've got a LOT of partially knit items floating around, and they need to be dealt with before I even consider starting anything else. (Yes, yes, I know I say this all the time, even while casting on......) But this time I'm serious - I called in a professional. The lovely Miss KBlake is The Best at assessing WIPs and deciding 1. if you are ever going to finish something, 2. if, once finished, you will ever wear/use/etc. said project, 3. putting all of these projects in an approachable order. So I called her in! So far THIS YEAR I have finished TWO things:
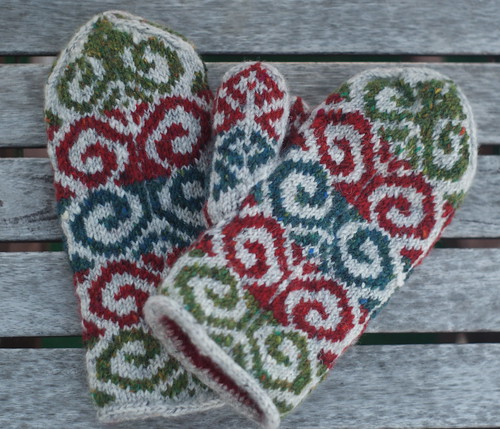 These mittens, which needed.....ONE LINING.
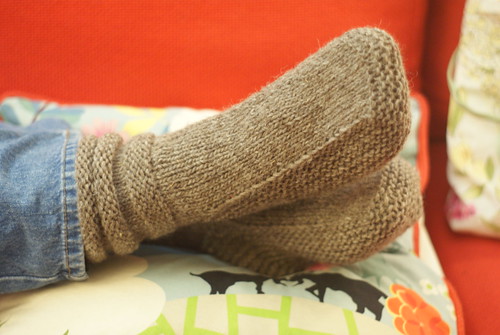 And these Mukluks, which needed...HALF A SLIPPER KNIT UP.
I'm moving on to some of the larger sweateresque projects now. At this rate, if I can hold onto it, I should have an empty WIP basket by the end of February ;)
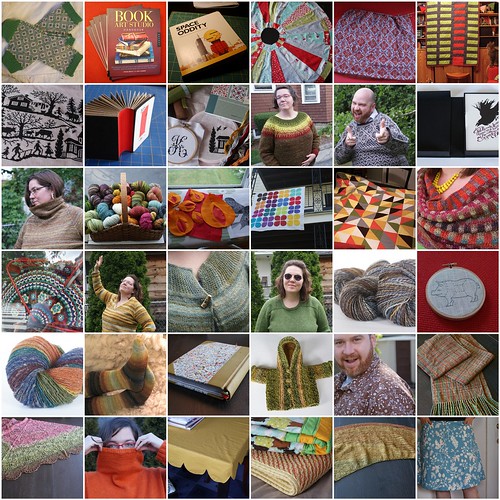
Oh yeah, here's a 2012 round-up:
And these Mukluks, which needed...HALF A SLIPPER KNIT UP.
I'm moving on to some of the larger sweateresque projects now. At this rate, if I can hold onto it, I should have an empty WIP basket by the end of February ;)
Oh yeah, here's a 2012 round-up:
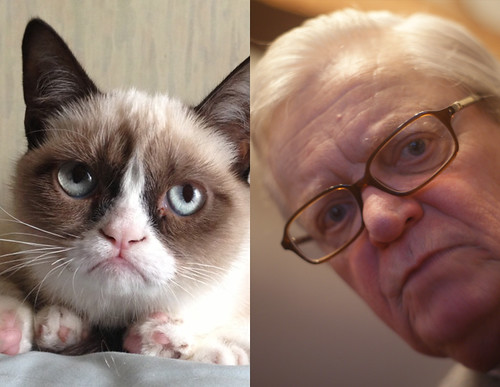
 ANNNNNNDDDDDDD my uncle looks like GrumpyCat:
My book is out! After many many editings and many many photoshoots, along with being told that the book was set for APRIL 2013 publication, the book that I wrote with Amy Lapidow came out a week before Christmas! I'm thrilled to hold it in my hands, though I will admit to not yet sitting down and really spending any time with it yet. (I was still exhausted from looking through the same pages so many times....) But I am THRILLED THRILLED THRILLED that it is out and very excited to see what people make from it!
In 2013 news, I've decided to take on a few larger projects - one new, many old.
First up, I've decided to do a sketch-a-day through the year. I'm already mildly anxious for warmer weather as all of my sketches so far are late night, in the house.
But the thing I'm really looking forward to - I mean REALLY - is taking care of some unfinished projects. I've got a LOT of partially knit items floating around, and they need to be dealt with before I even consider starting anything else. (Yes, yes, I know I say this all the time, even while casting on......) But this time I'm serious - I called in a professional. The lovely Miss KBlake is The Best at assessing WIPs and deciding 1. if you are ever going to finish something, 2. if, once finished, you will ever wear/use/etc. said project, 3. putting all of these projects in an approachable order. So I called her in! So far THIS YEAR I have finished TWO things:
These mittens, which needed.....ONE LINING.
And these Mukluks, which needed...HALF A SLIPPER KNIT UP.
I'm moving on to some of the larger sweateresque projects now. At this rate, if I can hold onto it, I should have an empty WIP basket by the end of February ;)
Oh yeah, here's a 2012 round-up:
ANNNNNNDDDDDDD my uncle looks like GrumpyCat:
Saturday, December 1, 2012
World AIDS Day Project
The ever-so-gracious and absolutely wonderful Stephen is once again hosting his Worlds AIDS Day Project, this year with funds raised going to the Lansing area AIDS network. It's for a great cause, and Stephen has gathered up a GREAT group of sponsors and prizes that you can win for contributing. And I'm one of them!
This handmade album could be yours:
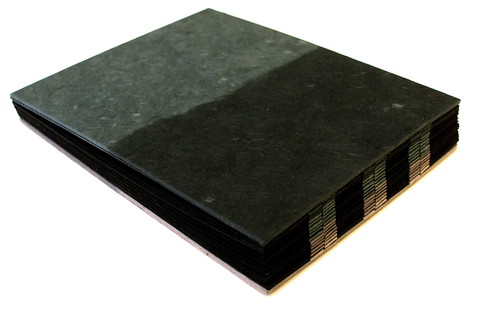 Head on over here to read all about this great cause and how you can help.
Head on over here to read all about this great cause and how you can help.
Saturday, November 10, 2012
Connie
Amy's MIL Connie is a big quilter. Due to failing eyesight and portability, she only works on hex quilts these days, and they are done completely by hand. She likes to test the limits of the hex while remaining true to the traditional quilting patterns and methods.
I was visiting Connie the other day to do some finish work on her bookshelves. She's also in a state of divesting her quilt library. Welcome to MY new quilt book collection:
 While I was there, I chatted to her a bit about her quilts, and managed to get some pictures of her 3 most prized quilts, which are the main features of 2 bedrooms in her home.
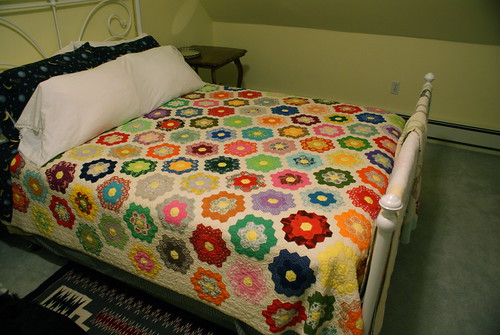 This first one is made from 2" hexes. Connie collected fabrics from all of her neighbors and students and parents and all the people in her life at the time, and made this fantastic traditional flower hex quilt. She said she enjoyed working on the hex quilts while her kids were young due to how easy it was it was to take along with her. The quilting itself took longer than the top - she couldn't take it with her, and had to work on it in spurts here and there. But she got it done!
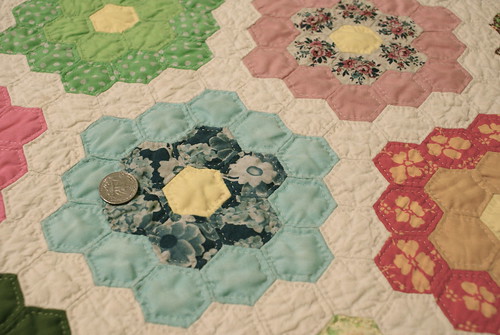 Connie decided to take the hexes a step further - this next quilt is constructed of hexes that end up being 1/2" once sewn. She says this is the smallest reasonable (HA!) size to work with and still have shape and pattern recognition in the finished quilt. This quilt is BANANAS. Due to the excess material behind each hex piece, the finished quilt has a slightly puffed-hex feel to it.
 She opted to maintain the hexagonal edges on this one. The finished piece is about 40" x 30".
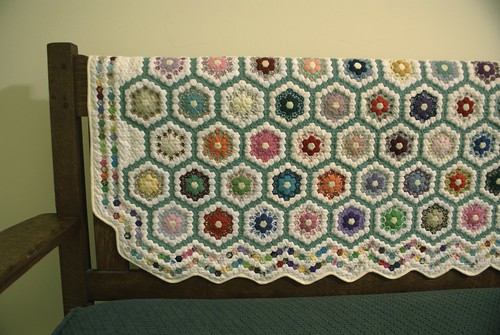
 I got the impression from Connie that the quilt she is most proud of is her Bicentennial Quilt. It's a red-white-and-blue hex quilt that is chock full of fussy-cuts.
 In talking with her, she mentioned that many bicentennial quilts were constructed to include parts of ancestral centennial quilts that were never completed! Connie didn't have any of those on hand, but she also did not want to leave her children with an unfinished quilt. She opted to have the hand-quilting done by someone else, but maintained the traditional quilting patterns.
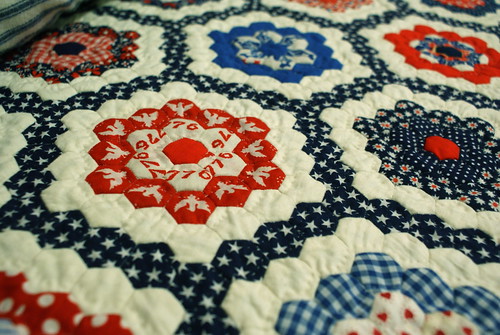 She also "signed" it in 2 corners, with fussy cuts of her name.
 Connie's asked me to help her sign the back of these quilts by embroidering her signature on the back of each. Hooray! It will be great to get a better feel of how they're made.
More Connie chronicles to come - she claims to have some unfinished quilt pieces to pass on to me, and I'm sure to be inspired by this bundle of books!
Connie's asked me to help her sign the back of these quilts by embroidering her signature on the back of each. Hooray! It will be great to get a better feel of how they're made.
More Connie chronicles to come - she claims to have some unfinished quilt pieces to pass on to me, and I'm sure to be inspired by this bundle of books!
While I was there, I chatted to her a bit about her quilts, and managed to get some pictures of her 3 most prized quilts, which are the main features of 2 bedrooms in her home.
This first one is made from 2" hexes. Connie collected fabrics from all of her neighbors and students and parents and all the people in her life at the time, and made this fantastic traditional flower hex quilt. She said she enjoyed working on the hex quilts while her kids were young due to how easy it was it was to take along with her. The quilting itself took longer than the top - she couldn't take it with her, and had to work on it in spurts here and there. But she got it done!
Connie decided to take the hexes a step further - this next quilt is constructed of hexes that end up being 1/2" once sewn. She says this is the smallest reasonable (HA!) size to work with and still have shape and pattern recognition in the finished quilt. This quilt is BANANAS. Due to the excess material behind each hex piece, the finished quilt has a slightly puffed-hex feel to it.
She opted to maintain the hexagonal edges on this one. The finished piece is about 40" x 30".
I got the impression from Connie that the quilt she is most proud of is her Bicentennial Quilt. It's a red-white-and-blue hex quilt that is chock full of fussy-cuts.
In talking with her, she mentioned that many bicentennial quilts were constructed to include parts of ancestral centennial quilts that were never completed! Connie didn't have any of those on hand, but she also did not want to leave her children with an unfinished quilt. She opted to have the hand-quilting done by someone else, but maintained the traditional quilting patterns.
She also "signed" it in 2 corners, with fussy cuts of her name.
Connie's asked me to help her sign the back of these quilts by embroidering her signature on the back of each. Hooray! It will be great to get a better feel of how they're made.
More Connie chronicles to come - she claims to have some unfinished quilt pieces to pass on to me, and I'm sure to be inspired by this bundle of books!
Subscribe to:
Posts (Atom)