
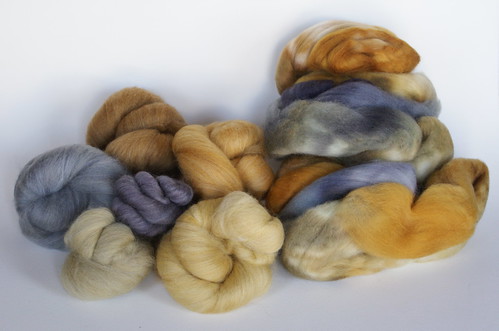
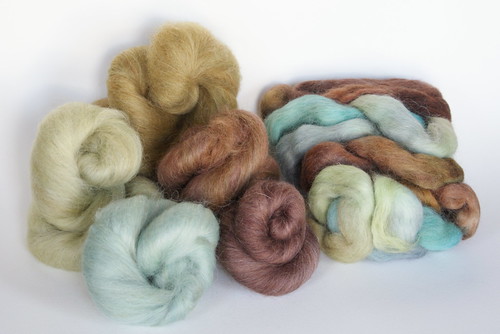
(Original fiber on the right in all pictures)
.....moved on to this:

...and then came the Wensleydale (as usual):
A few people expressed interest in a wee photo tutorial of this process, so I decided to document the whole thing, and HERE YA GO!
STACIE'S SWIFTY CARDING TUTORIAL!
Step One:

Find a nice fiber with hearty contrast and make sure the colors don't bleed into each other too much. I'm using HY "Pate de Fruit" in Rambouillet.
Step Two:
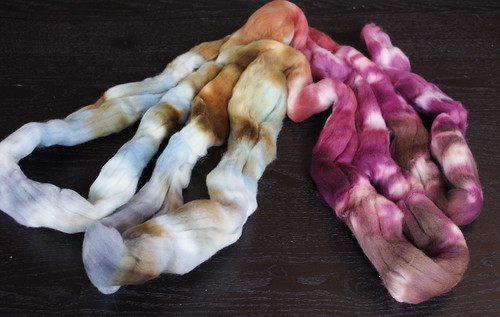
I usually fold up my fiber and align the colors to get a better idea of just how many breaks I should make. In this case, I'm going with the darkest blue-grey, light blue, mint green, ochres, that coral-esque color, brightest pinks, darker purples, and the brown-purple tone.
Step Three:

Tear it all apart! I tear it up as close to the color splits as I can, but I don't worry too much about other colors getting in there. That will just add to the heathering of each batt.
Step Four:

Open up each bundle of color and run it through the carder. Be patient, take your time. This picture isn't that great, but I really make sure to open things up and spread out any errant colors.
Step Five:
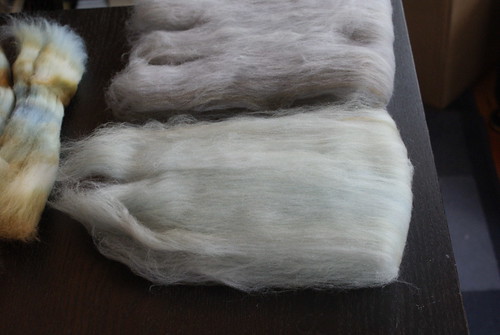
Here are 2 of the color bundles run through the carder. You can see that there is a little bit of striping in the closer one, that's because I only ran it through the carder once at this point, so the colors aren't completely blended.
Step Six:
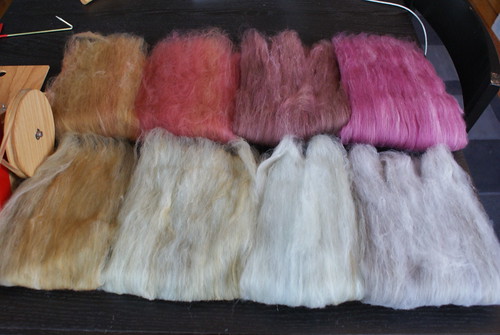
Here are all 8 of the colors, having gone through the carder once. Some of these are really close in tone (especially those two on the left), but I'm going to run them through a second time and see how they come out before deciding if I want to combine them.
Step Seven:
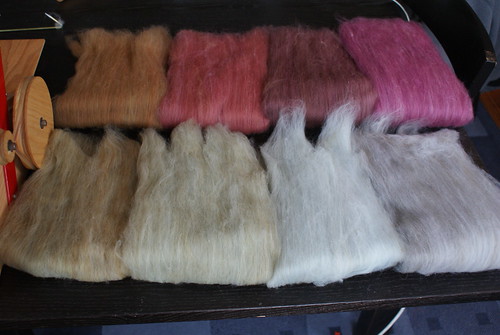
....And here they are after the second pass through the carder. The colors are better blended. I could run them through a third (or fourth) time at this point, but I'm happy with how they look now.
Step Eight:

Bundle 'em up and admire your work! The lighter bundles here are all very close, but I think I can use them nicely for some colorwork, with subtle changes.
Now go spin them up!
Thanks for reading, and I hope this all makes sense!
PERFECTION. Excellent explanations and superb piktoors!
ReplyDeleteomg, i want to card all the things on my drum carder now instead of hand carding!!!!! thanks for the step-by-step tutorial. It reminded me of this: http://youtu.be/ay6GjmiJTPM
ReplyDeleteThank you so much for this tutorial!! I totally want a drum carder now! How perfect for colorwork to split everything up and it still all compliments each other. Love it!!
ReplyDeleteSuper tutorial!! And you're welcome to send me all the fibers!
ReplyDeleteAwesome tutorial!Thank you.
ReplyDeletePerfect timing for me - great information - Thanks!
ReplyDeleteThanks so much for taking the time to show us your skillz, Stacie! Very helpful! Now I just need a drum carder.... ;0
ReplyDelete-stripedsocks
Brilliant - Thanks very much for the tutorial.
ReplyDeleteNow sneaking over to look at the fruits of you labours in your Rav stash!
Here are some tips to keep in mind when using this site. First of all, make sure you know what carding is. Carding is a practice that has become increasingly popular. In fact, carding forums play a large role in strategy. If you want to get more interesting details about carding guide, you may go here.
ReplyDelete